In the age of digital content and services, managing subscriptions has become a crucial part of our digital lives. iPhone users, in particular, often find themselves navigating through a myriad of subscriptions, from streaming services like Netflix and Spotify to productivity tools and fitness apps. The ease with which one can subscribe to these services directly from their device is a double-edged sword; while it offers unparalleled convenience, it can also lead to forgotten subscriptions silently draining your wallet. This comprehensive guide aims to empower iPhone users with the knowledge to take control of their subscriptions, ensuring they only pay for the services they truly use and enjoy.
Understanding Subscriptions on iPhone
Before diving into the cancellation process, it’s important to understand how subscriptions work on the iPhone. When you subscribe to an app or service through the App Store, Apple handles the billing and subscription management. This centralized approach makes it easier to view and manage all your subscriptions in one place. However, it’s crucial to note that deleting an app does not cancel its subscription. As long as the subscription remains active, you will be billed, regardless of whether the app is installed on your device.
Finding Your Subscriptions
The first step in managing your subscriptions is to locate them. Apple has made this relatively straightforward:
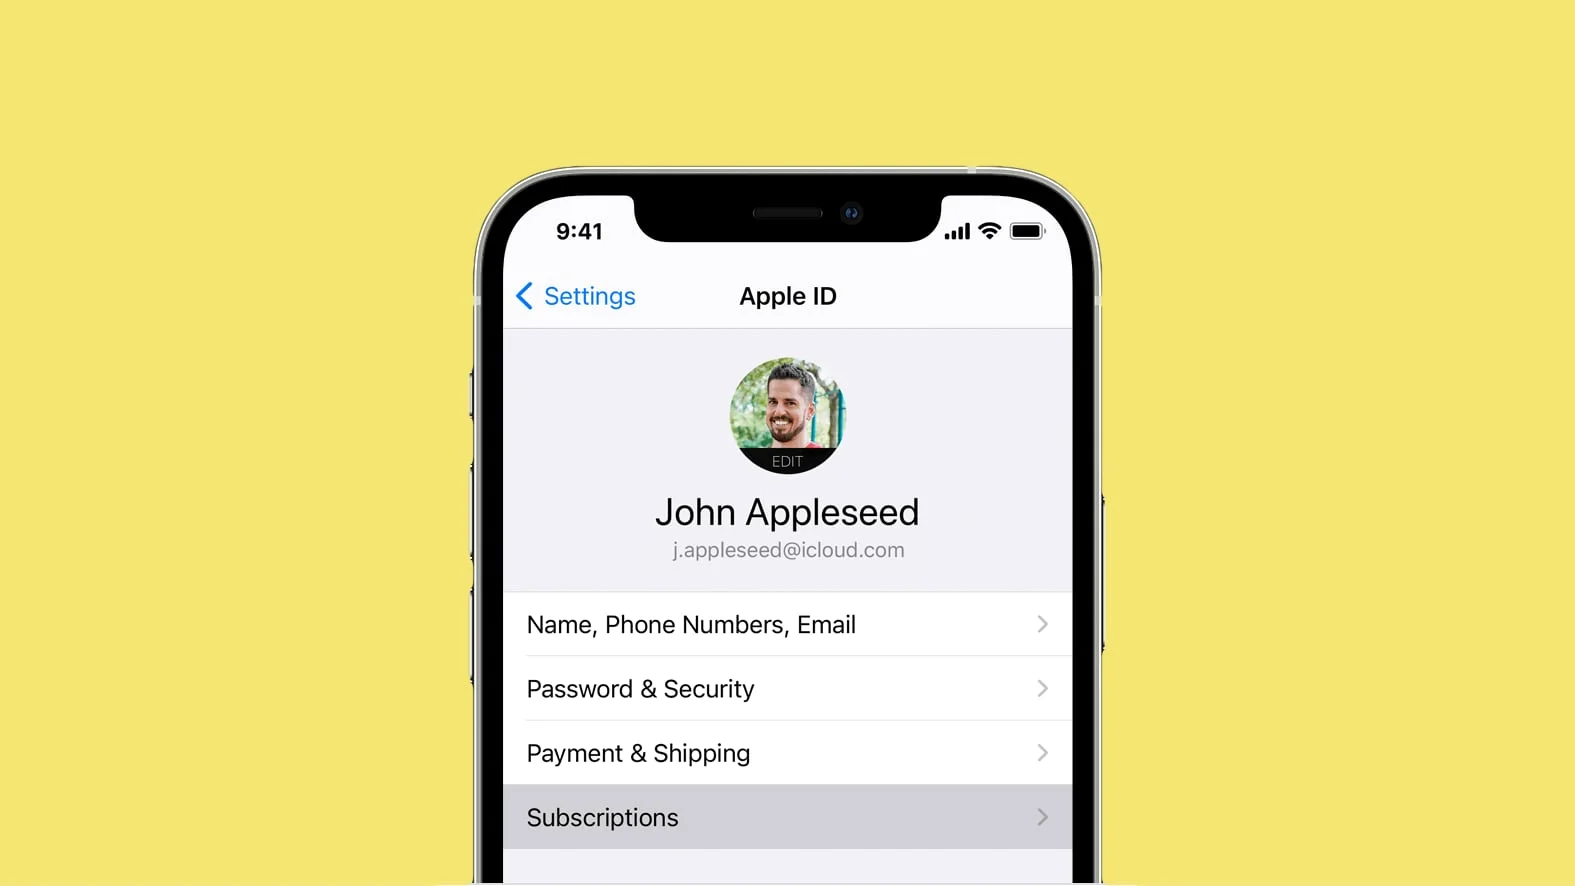
- Open the Settings app on your iPhone.
- Tap your name at the top of the settings menu to access your Apple ID settings.
- Select “Subscriptions.” Here, you’ll find a list of all your active and expired subscriptions tied to your Apple ID.
This section provides a clear overview of what you’re currently subscribed to, the cost of each subscription, and the renewal dates. It’s a good habit to review this list periodically to ensure you’re only subscribed to services you use.
How to Cancel a Subscription on iPhone
Once you’ve identified a subscription you wish to cancel, the process is straightforward. Follow these steps:
- Select the subscription you want to cancel from the list.
- Tap “Cancel Subscription” (or “Cancel Free Trial” if you’re in a trial period). You might need to scroll down to find this option.
- Confirm your decision to cancel when prompted.
After you’ve canceled a subscription, you will still have access to the service until the end of the current billing cycle. For example, if you cancel a monthly subscription halfway through the month, you’ll retain access until the end of that month.
What Happens After Cancellation?
Understanding what follows after you cancel a subscription is as important as knowing how to cancel it. Once a subscription is canceled, you will no longer be billed for it in the future. However, your access to the subscription’s features will continue until the end of the current billing period. After that, you might lose access to the content or services provided by the app. It’s worth noting that some subscriptions offer a grace period, allowing you to reactivate your subscription within a certain timeframe after cancellation to retain your preferences or data.
Managing Subscriptions Not Listed Under Your Apple ID
There might be instances where a subscription you’re looking to cancel isn’t listed under your Apple ID subscriptions. This situation can occur if the subscription was set up directly through a service’s website or through another platform. In these cases, you’ll need to cancel the subscription through the service’s website or by contacting their customer support. Always ensure to check the service’s cancellation policy, as some might require notice before the billing period ends.
Tips for Managing Your Subscriptions More Effectively
To avoid unnecessary spending and keep your subscriptions in check, consider the following tips:
- Regularly Review Your Subscriptions: Make it a habit to check your subscriptions every few months. This practice can help you identify and cancel subscriptions you no longer use or need.
- Take Advantage of Free Trials Wisely: Free trials are a great way to test services, but remember to cancel them before the trial period ends if you decide not to continue.
- Understand the Terms: Before subscribing, understand the terms, especially regarding cancellation. Some subscriptions may have specific conditions or windows for cancellation.
Conclusion
In today’s digital-first world, managing subscriptions on your iPhone is a necessary skill to ensure you’re only investing in services that offer you value. By following the steps outlined in this guide, you can take control of your subscriptions, avoiding unnecessary expenses and keeping your digital life organized. Remember, the key to effective subscription management is regular review and being mindful of the services you truly use and enjoy.
FAQs: Managing Subscriptions on iPhone
Q1: Can I cancel a subscription through the App Store?
A1: Yes, you can manage and cancel your subscriptions through the App Store. Open the App Store, tap on your profile icon at the top right, choose “Subscriptions,” and then select the subscription you wish to cancel.
Q2: If I cancel a subscription, do I get a refund?
A2: Generally, canceling a subscription does not automatically entitle you to a refund for the current billing cycle. Your access to the subscription continues until the end of the current billing period. However, you can contact Apple Support to discuss any refund requests.
Q3: What happens if I accidentally delete an app with an active subscription?
A3: Deleting an app does not cancel its subscription. You will continue to be charged until you manually cancel the subscription using the steps outlined above.


